In this article:
- Understanding ProRes Log on the iPhone 15 Pro
- iPhone 15 Camera Settings
- Optimizing Exposure for ProRes Log
- Color Grading Apple ProRes Log
The iPhone 15 Pro has introduced a groundbreaking feature - the ability to shoot in ProRes Log. This new feature offers enhanced dynamic range and flexibility for professional-grade footage. In this article, I will guide you through the best settings to use while shooting ProRes Log on your iPhone 15 Pro, as well as tips for optimizing exposure and color grading to achieve stunning results.
iPhone 15 Pro LOG Test + Test Footage (Free Download)
Get the LUTs I used in this Video
☝🏼 Understanding ProRes Log on the iPhone 15 Pro
Before diving into the settings, let’s understand what ProRes Log is and why it is a game-changer for mobile videography. ProRes Log is a logarithmic encoding format that captures a wider dynamic range of light and color information. This extended range allows for greater flexibility in post-production, enabling you to have more control over the final look of your footage.
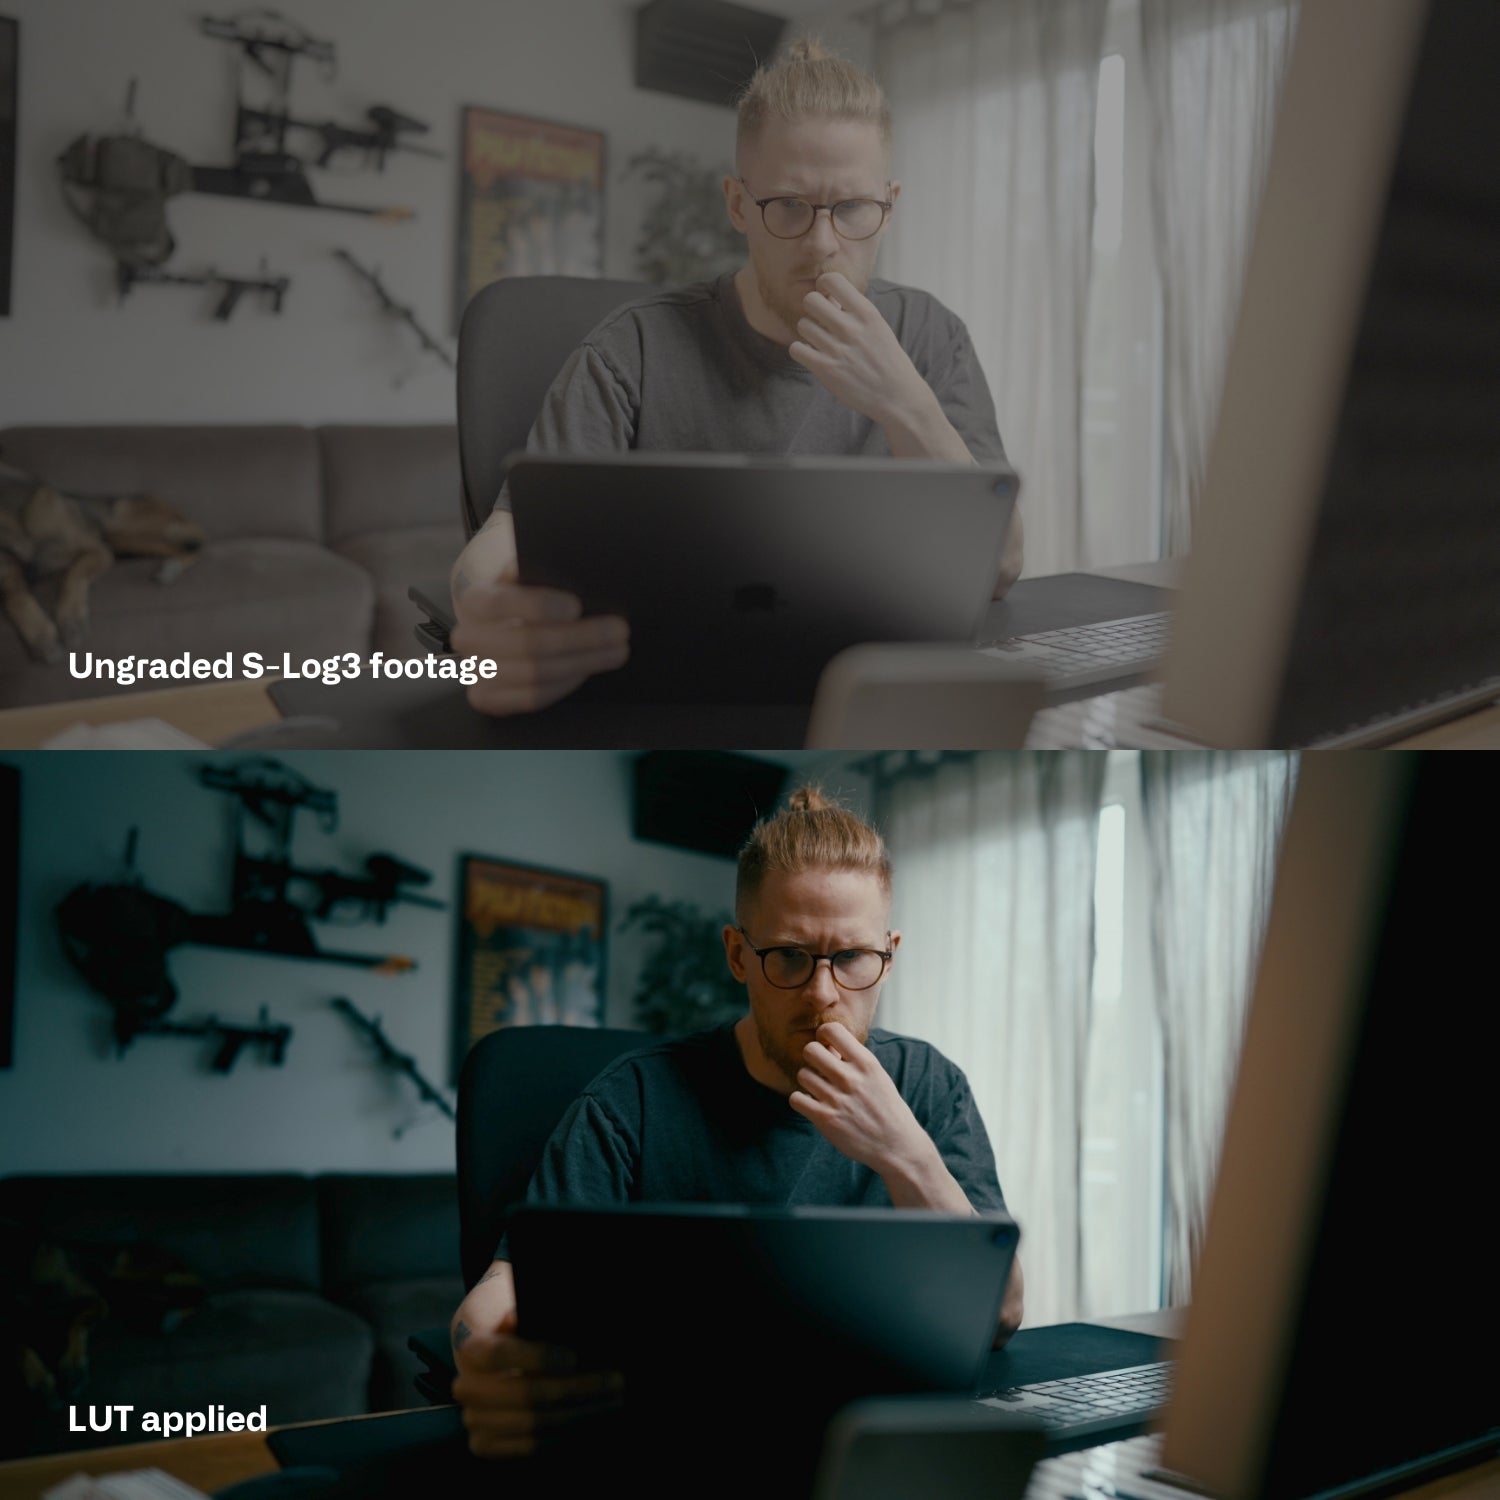
By shooting in ProRes Log, you can capture more details in both the highlights and shadows, resulting in a more balanced and visually appealing image. However, it’s important to note that ProRes Log footage appears flat and desaturated straight out of the camera. This is intentional, as it preserves the maximum amount of image data for grading in post-production.
And the most important since smartphone filmmaking became a thing:
The overprocessed digital sharpness is gone with ProRes Log!
🎥 iPhone 15 Camera Settings
To start shooting in ProRes Log on your iPhone 15 Pro, follow these steps:
- Open the "Settings" on your iPhone and go to "Camera".
- Tap on "Formats" and enable Apple ProRes under "Video Capture".
- Under "ProRes Encoding" chose "Log".
- Adjust other settings, such as resolution (Record Video settings), frame rate and stabilization as well as "Preserve Settings" to keep the settings in your camera app even if you quit the app or lock the iPhone!
By enabling ProRes Log, you are now ready to capture footage with increased dynamic range and flexibility.

💡 How to Expose Apple LOG?
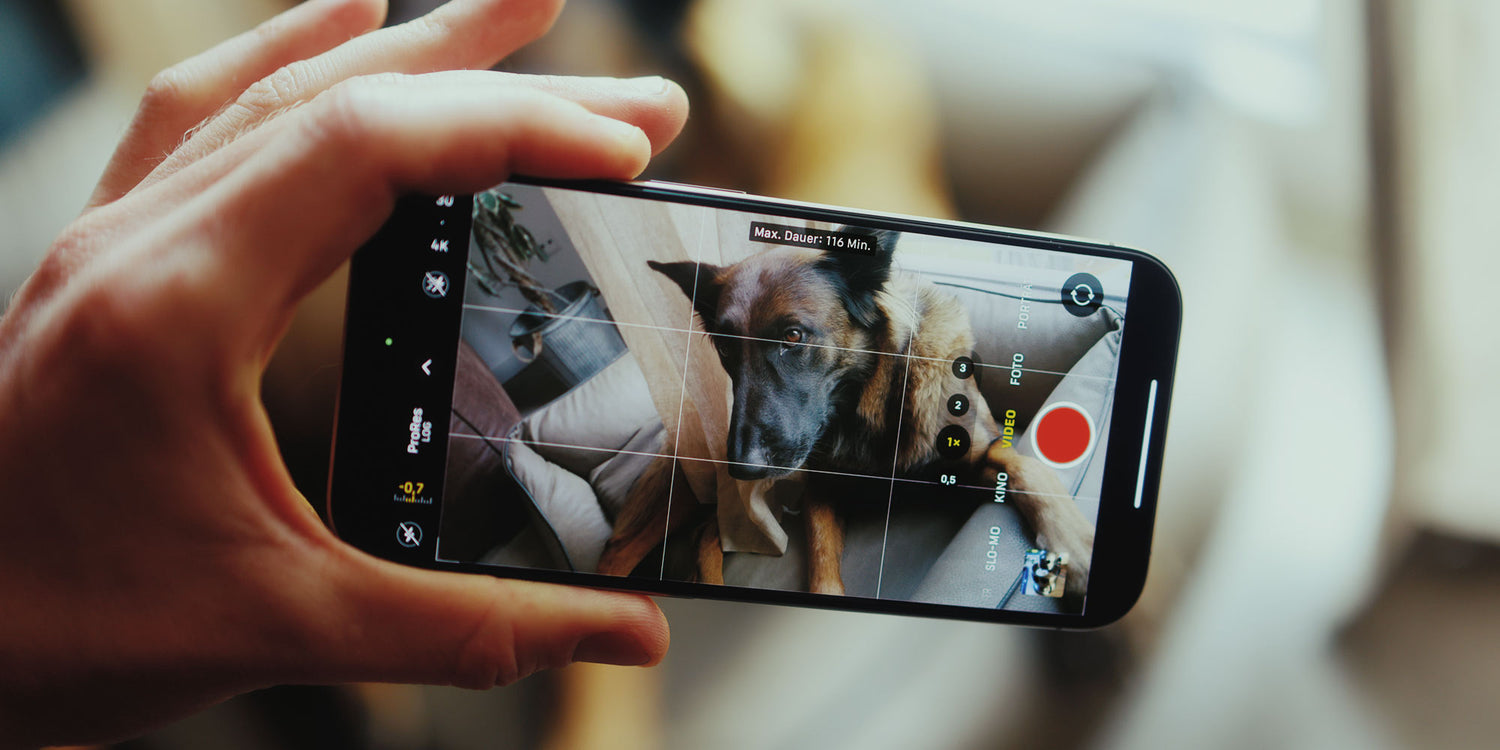
When shooting in ProRes Log, it’s crucial to nail the exposure. While on most other cameras you should ETTR (Expose to the right) with Apple Log and the iPhone 15 Pro / Max it's better to UNDEREXPOSE!
That's because the camera sensor of the iPhone can't be compared to those on a professional mirrorless camera. The iPhone tends to overexpose the image by default a bit and also increases ISO to get a brighter image - This leads to more noise in your image which we don't want.
By underexposing -1 to -2 stops you will get a much cleaner image that still has a lot of information to play with in post production.
To optimize exposure:
Just go to your camera app and click on the little Exposure Meter in the upper left. Now you can dial in your prefered exposure (I use -0.7 to -1.3 most times).

By properly exposing your ProRes Log footage, you will capture a well-balanced image with ample details to work with during the post-production process.
Which settings should you also change?
Lock White Balance:
Go to "Record Video" in the Camera settings and scroll all the way down to turn on LOCK WHITE BALANCE. This prevents your videos to shift in white balance while recording!
HDR Video (High Efficiency):
Just turn that sh*t off, it looks horrible.
Record Video:
If you are shooting for short form content like Reels/TikToks/Youtube Shorts, go for 4K 30fps.
If you want to slow down your videos in post just go for 60fps - You can also toggle this directly in the camera app by clicking on the upper right frame rate for switching real quick between frame rates.
If you want to go for that more choppy cinematic look chose "4K at 24 fps". Keep in mind that the stock camera app raises your shutter automatically depending on the available light in your scene. If you need a constant shutter speed of 1/50 or an shutter angle of 180° you need a third party app like the excellent (and free) Blackmagic Camera to set your shutter (and other values like ISO, white balance) to a static value.

🖥️ Color Grading Apple ProRes Log
Now comes the exciting part - color grading your ProRes Log footage to achieve the desired look. While there are numerous creative possibilities, here are some general tips to get you started:
- Import your ProRes Log footage into a reliable video editing software that supports ProRes Log, such as Final Cut Pro or DaVinci Resolve.
- Apply a LUT (Look-Up Table) designed specifically for ProRes Log footage. LUTs are pre-defined color transformations that can help you quickly apply a specific look and feel to your footage. I created an iPhone LUTs Pack especially for the iPhone 14, iPhone 15 Pro / Max that includes film looks for LOG footage and normal Rec.709 video.
- Adjust the exposure, contrast, saturation, and color balance to fine-tune the mood and visual impact of your video.
- Experiment with different creative choices, such as adding film grain, applying vignettes, or using color palettes, to make your footage stand out.
My best Film Look LUTs for the Apple iPhone 15 Pro (LOG & Rec.709 footage) 👇🏼
Remember, the goal of color grading is to enhance the visual storytelling and evoke emotions. Don’t be afraid to explore different options and find a unique style that suits your project.
In conclusion, shooting in ProRes Log on the iPhone 15 Pro opens up new possibilities for mobile videography. With the right settings, proper exposure, and skillful color grading, you can elevate your videos to a professional level. Start experimenting with ProRes Log and unleash your creativity on the powerful iPhone 15 Pro!






Leave a comment
All comments are moderated before being published.
This site is protected by hCaptcha and the hCaptcha Privacy Policy and Terms of Service apply.